Let’s find out how to the best use OneDrive, the cloud storage service from Microsoft, on any platform. A few simple tips to make the most.
What is OneDrive?
OneDrive is a storage service in the cloud developed by Microsoft in 2007 and brought to the American public in beta under the name Windows Live Folder. A few days later, the program has proven to users American, Indian and English in the final version, with the name of the Windows Live Skydrive, allowing you to upload files to your own ” personal folder on the web. ” A year later he opened WL Skydrive users globally, offering first 5 GB, then 25, and then 7 GB free.
In 2012, with the closure of the department Windows Live, the service has been modernized by changing his name to Microsoft SkyDrive, version closer to that currently available. Through it, using a Microsoft account, you can store files of any type on their own personal folder in the cloud, which is useful for the use of the data from any device with an Internet connection, or for safe keeping.
These files can moreover, be shared with other users who, in some cases (such as electronic documents. Doc or. Xls), may also cooperate simultaneously with the realization of the same. In short, a real competitor to Dropbox, Google Drive and Google Documents, or Copy. Now, SkyDrive name changes (due to a legal dispute with the British BSkyB) and becomes OneDrive, the only place where you put your files, introducing some new features.
The first step: The account on OneDrive.
OneDrive is available immediately and free of charge to all users with Microsoft account. In case if he already has a used one for the store in Windows 8 or Windows Phone, Hotmail, Xbox Live or recently you’ve subscribed to Skype with a new device, that data will be fine for OneDrive login. In case you did not have anything, simply register free of charge to the relevant page.
OneDrive is available natively for Windows 8 and 8.1, but the integration is different depending on the version of the operating system installed. On Windows 8, OneDrive is a normal app available in the Windows Store: Once installed, the app will integrate seamlessly with your computer. You do not need to do anything special for Windows 8.1: OneDrive is already available and configured automatically when you are done accessing your Microsoft account.
Users who are using versions prior to Windows 8, as 7 or Vista, the desktop version of the application can be downloaded from here. Beware, though: as you can see from the screen over here, the app has not yet been updated with the new name.
Once the application is installed and logged on with your Microsoft account, you can act in two different ways. The first is to use the application version of Metro, which is accessed from the Windows Start menu. By clicking on the big blue tile SkyDrive, you will immediately view the available files and folders, and right-clicking on a document. You will access the options: in the lower left corner, you can work on the file and then copy it, cut it or rename it, while on the right are links to select all content, create new folders or upload files. The interface is easy to use and master, especially remembering that in the upper-right corner, you can always change the view mode (by icons as big as the tile of Windows simple grid) and look in the archive of files.
OneDrive mobile – Windows Phone, iOS, Android.
OneDrive is also available as an app on iOS, Android and Windows Phone. Right on the mobile operating system from Microsoft, you can find great apps and functionality for integration with the phone without equal. First of all, Microsoft makes available an excellent option to automatically upload photos taken with the phone directly on OneDrive (be careful though: it still shows the old name SkyDrive).
The pictures will remain completely private and not visible to other people. To enable this feature, just go to settings in the Gallery (Picture’s hub, tap on the three dots, Settings) and enable automatic upload of OneDrive. You can also set the instant upload of photos directly via 3G or average quality in full resolution only via Wi-Fi. There is also the setting for uploading videos taken with the phone option is disabled by default. Also, in the photo album in the gallery of the phone, you can view the images in any folder of your OneDrive.

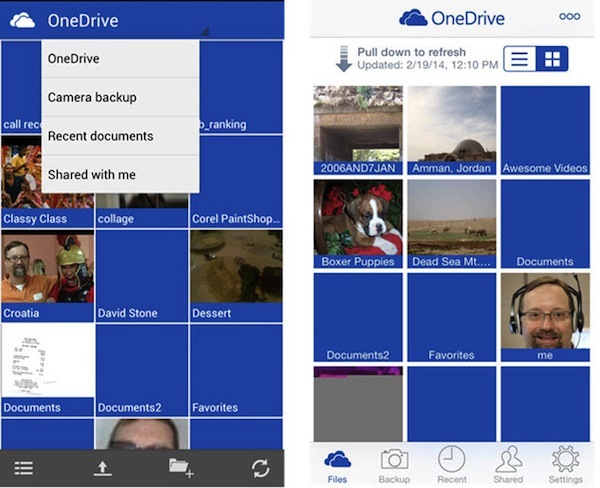
The native application (available on Windows Phone 7 and 8 to this page of the Store) instead allows you to manage all the content of their own space OneDrive. You can also view files of various formats, such as PDF or Word documents, create folders, set up shares, upload files, and much more. The application is very versatile and very easy to use, and it also has the same features as the version search for Windows and Mac From the Settings screen can also display the remaining space on your account.
The same application is also available for iOS and Android platform. The functions are the same as the one for Windows Phone and allow all of the same operations, except for the auto upload of photos, Feature only available for Windows Phone. Applications are also optimized for iPad and Android tablet, but the design of the app is marked by the Metro style, done by ” tiles ” colored and flat. The version for iOS is available on the AppStore at this link, while the Android version is naturally released to the Play Store to this page.
The use of a mobile version emphasizes what is the final value of the service: via OneDrive fact, you can work on your computer and storing your favorite files to edit in mobility on a smartphone or tablet. The power of the cloud based on Microsoft.
OneDrive – The Web interface.
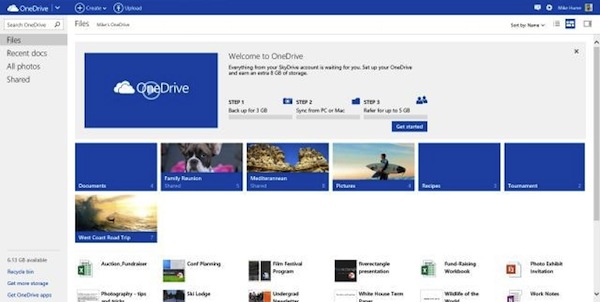
A real strength is his version of OneDrive via a web browser. Available at onedrive.live.com, the online application provides again a large part of the functionality of the version for Windows or Mac A great advantage of OneDrive compared to Dropbox and similar services is the ability to quickly create Word documents, Excel, Power Point and OneNote. You can quickly modify the online versions of these programs. This feature is available by clicking on the top bar on the Create button, and the button beside Upload precisely allows you to transfer files from your PC to the cloud of OneDrive.

Take the opportunity to see the sharing settings: right-clicking on a file and choosing Share, you can quickly create url link to the file, set permissions, post them on Facebook or Twitter or send them quickly by mail. On the left, the Permissions section will remind you if you have previously shared the file and in what way. Another feature very convenient, always available with a right-click a file, the version history: working on a file multiple times happen to make a mistake and want to go back. This function offers just that: you can see the old versions of the files on which you acted, and retrieve them in time.


